Wednesday, October 26, 2011

Captions!


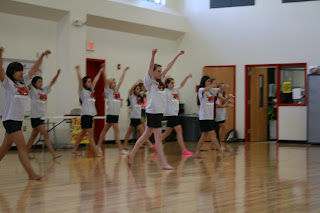
We learned the art of photo captioning in photojournalism this past week and took the lesson to use, going round the school taking pictures of various activities. Here is my favorite of the examples, I just like the movement. Also Kaitlyn Plasters is awesome, but that's neither here nor there. 


Moves like Plasters Practicing their step-and-drag move, senior Kaitlyn Plasters leads the dance as the class learns a sequence to Maroon 5’s “Moves Like Jagger.” The dance class learned one dance every two weeks and test time was about to draw near. “I really have a passion for dancing. Some say I’m a natural at it,” Plasters said. Photo credit Erin Powers.


Wednesday, October 12, 2011

Top Ten Tips 4-10

1. Move it from the Middle!
the typical stylings of the Rule of Thirds, nudging the camera a little to the side to make the subject of the picture not smack dab in the middle, ideally on the corners of the grid- the imaginary grid- to add interest.
2. Be a director!
Direct the people in your photo so that they arranged in a way that is pleasing to the eye

3. Watch the light
Shadows on the subject's face can often be distracting from the picture. So always know where the sun is and try not to get many facial shadows
a bad example of watching the lighting would be 

The last tip is just to know how far your camera's flash range is. Mine personally has a range of 10 feet. If the subject is farther away than 10 feet in a picture with flash, then it will be too dark to be a good photo.

Wednesday, October 5, 2011

Pops of Color

A really interesting technique in photojournalism is having everything in the photo black in white except for the subject, or really anything with interesting color. In Photoshop, the way to do this is to drag the photo you want into the Photoshop icon (as per usual) then drag the photo down into the layers bar so that there are multiple layers. Then to change the top layer to black and white, go to Image -> Adjustment -> Hues/Saturation, and make both the hue and the saturation zero. From there, using the eraser tool, erase all areas of the photo that are to be colorful, and finally click Image -> Flatten to flatten the picture into one layer.